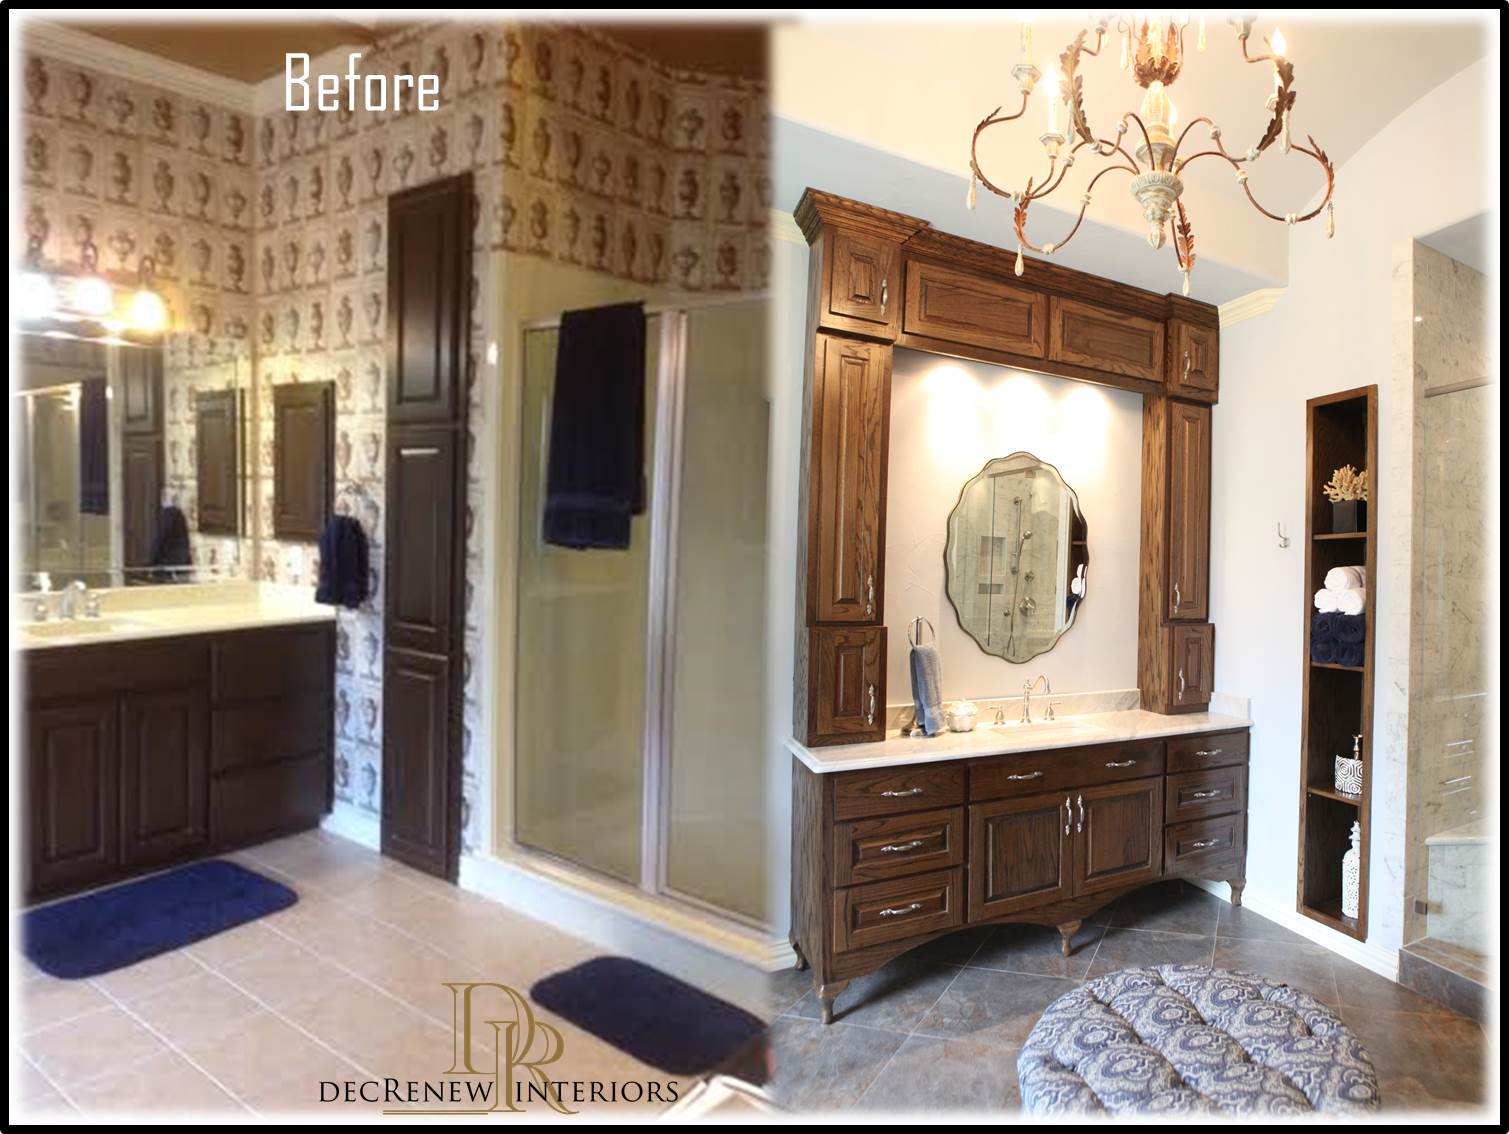
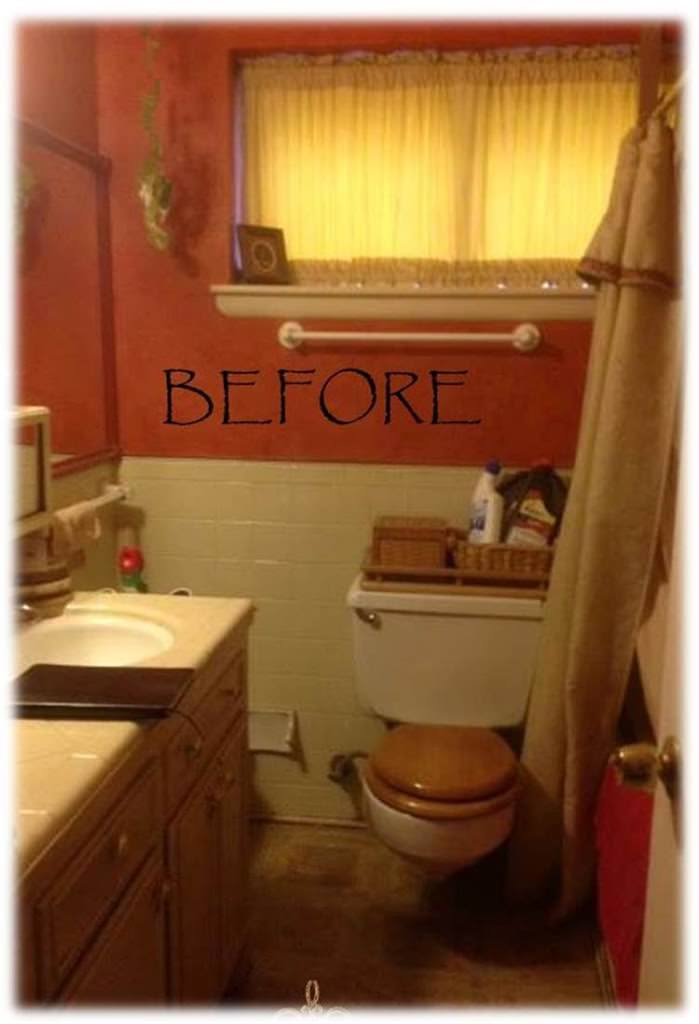
Grapevine Master Bedroom Makeover

BEFOREFullSizeRender

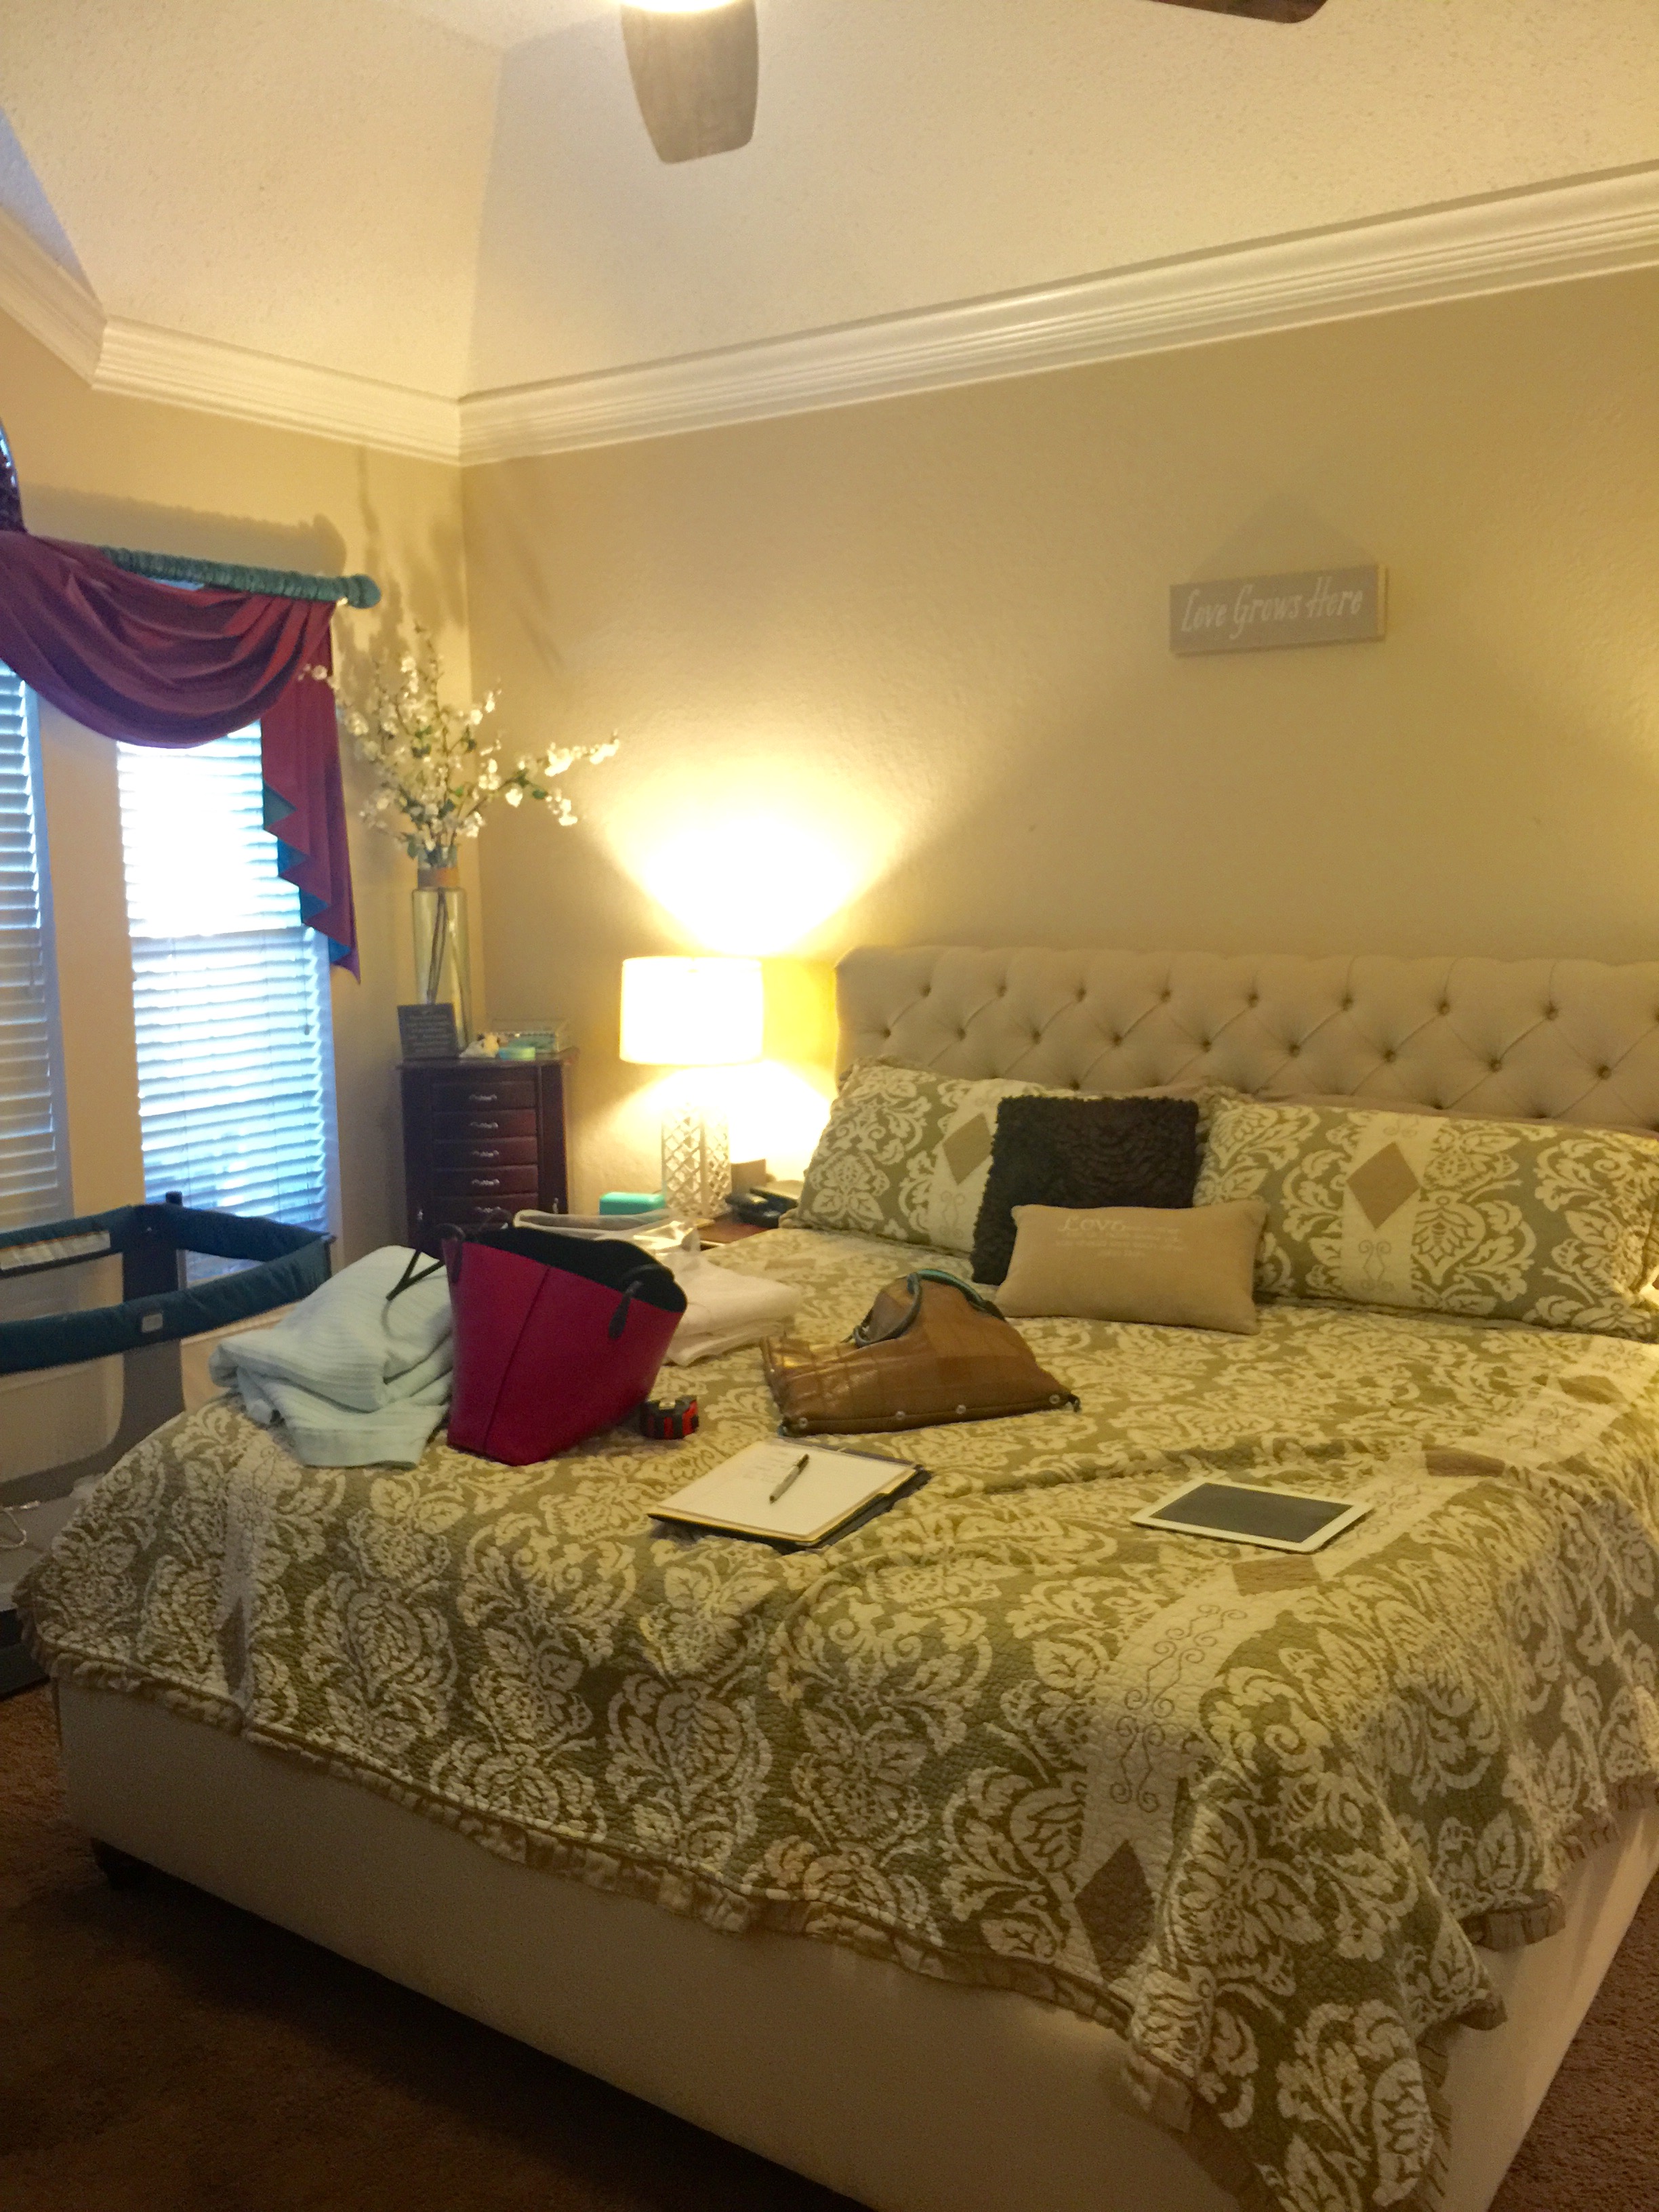
We completed a master bedroom for a client right before Thanksgiving.  They are recently empty nesters and are slowly starting to redecorate and remodel their home.

BEFORE (on day of install)

IMG_1929-e1449144298594

I got the privilege of assisting them, oh what a joy it was!

They decided to start with their master bedroom so it could be ready for the holiday season.
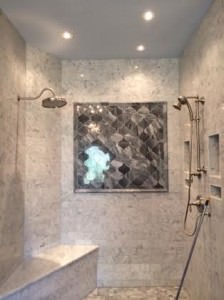
 AFTER

decrenew interiors

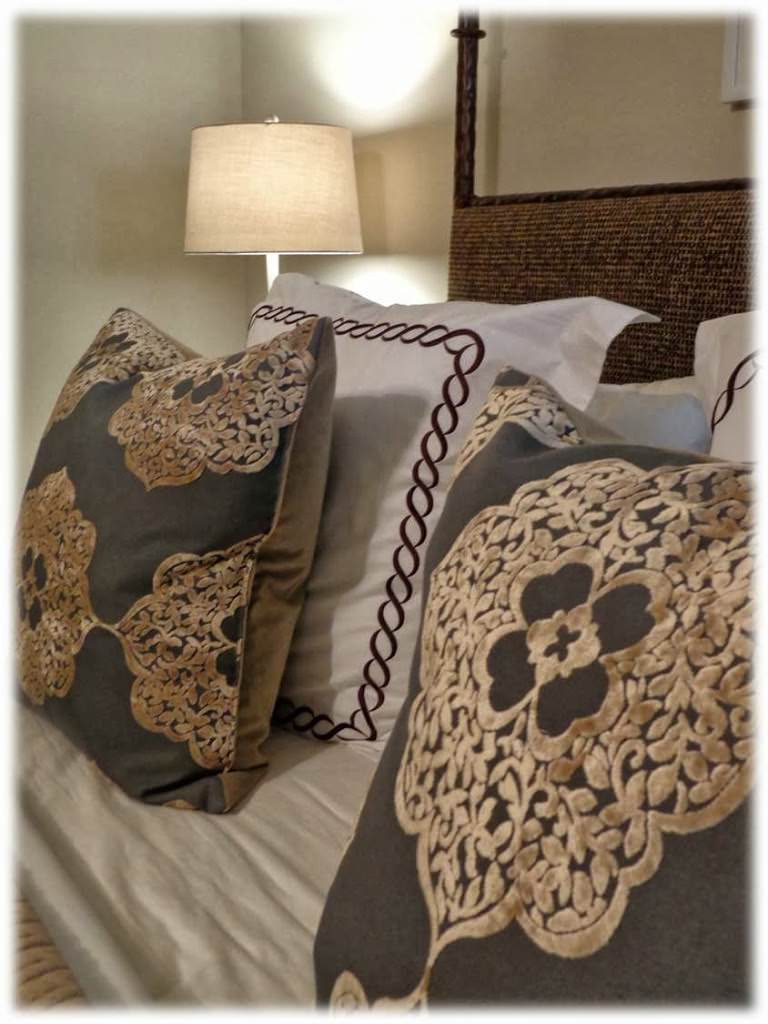
They had the bed already.  We added new bedding, side tables, lamps, artwork, accessories and draperies.

decrenew interiors 2

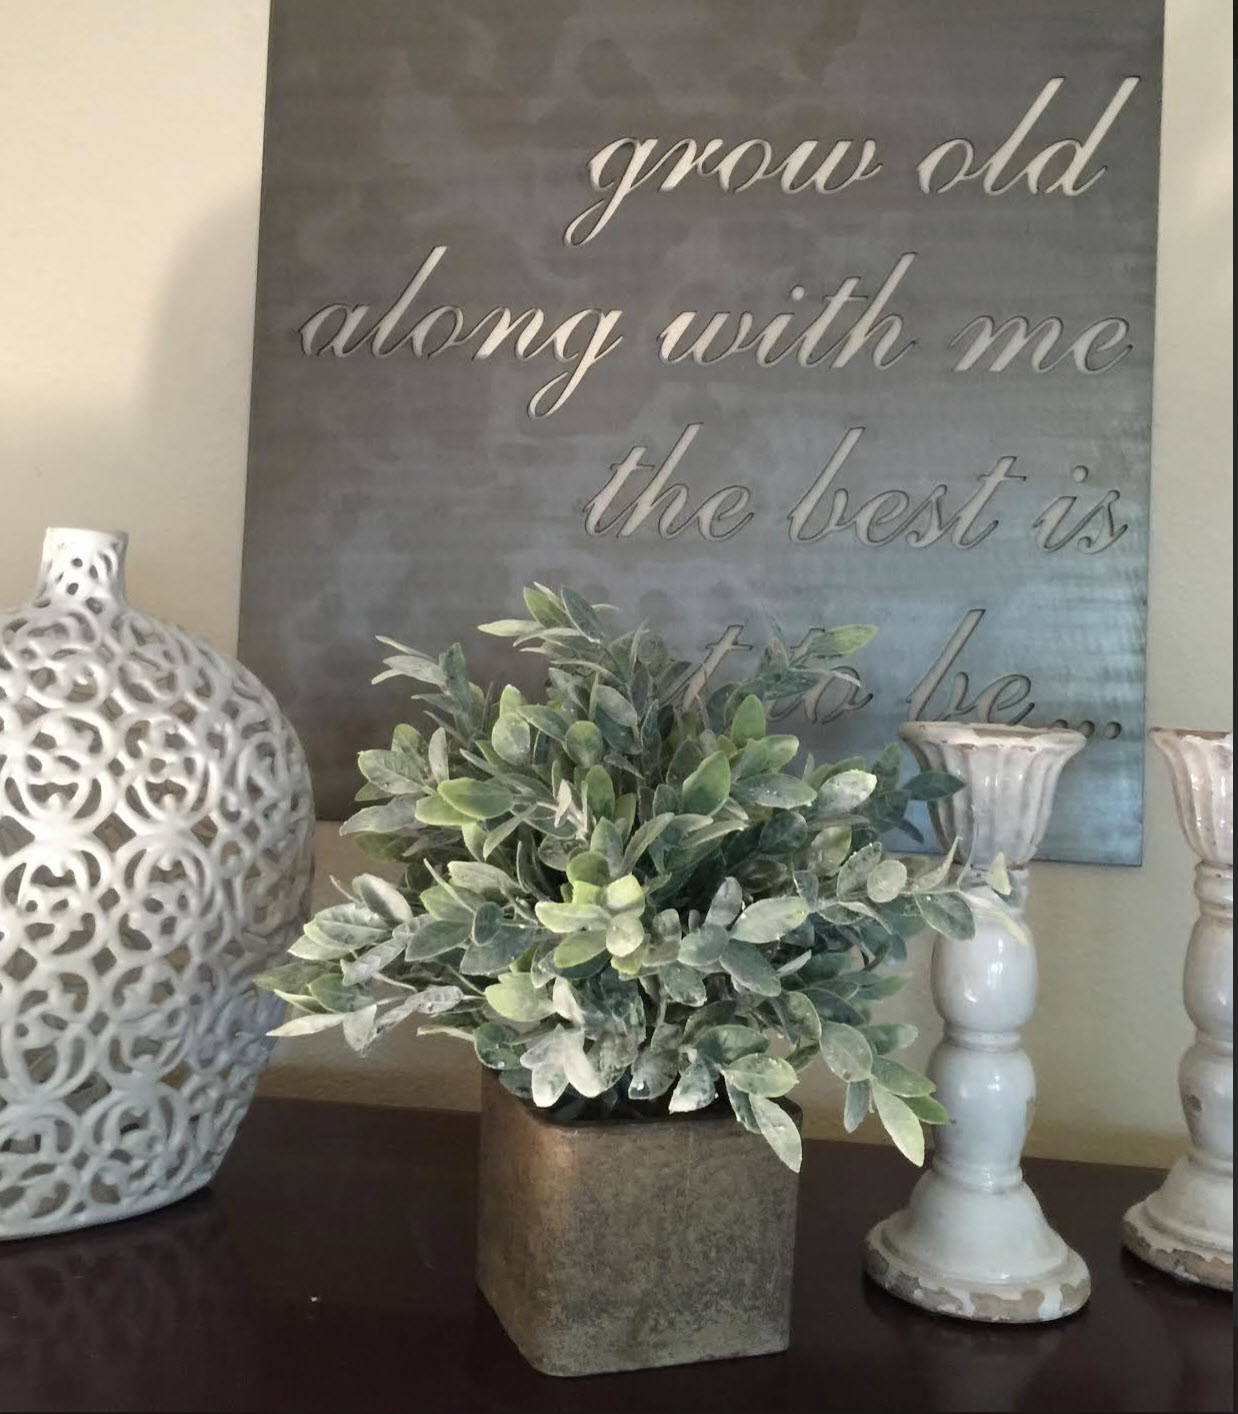
As you know, I love to use items the client already has.  I shopped their home for treasures and added them to the items I purchased to give it a "collected" feel.

DSC04577

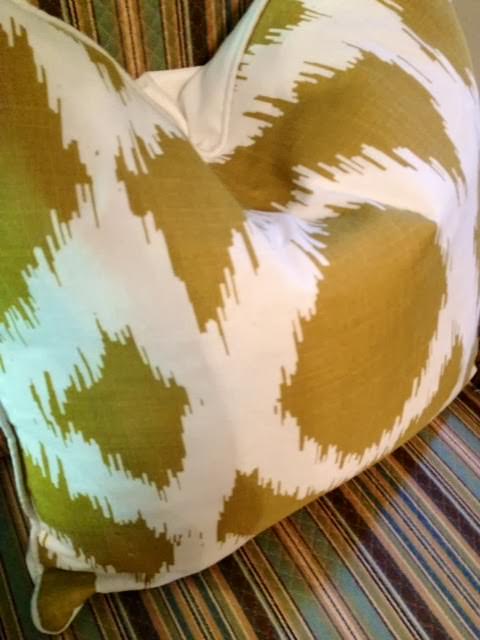
These pillows!!  Love the textures and variety of patterns. It is always amazing to me how a room comes together.  I started with an inspiration fabric (the draperies - see below) and go from there!  Layering textures on a bed is so luxurious and really makes a statement.  I do think that too many pillows can be overdone.

DSC045861-e1449142441699

For a king size bed, I usually use two king pillow shams or 3 euro shams.  For this room, I decided to use 2 king shams because I didn't want to cover up the tufting detail on the bed.  I then added three throw pillows.

21decrenew-interiors-61

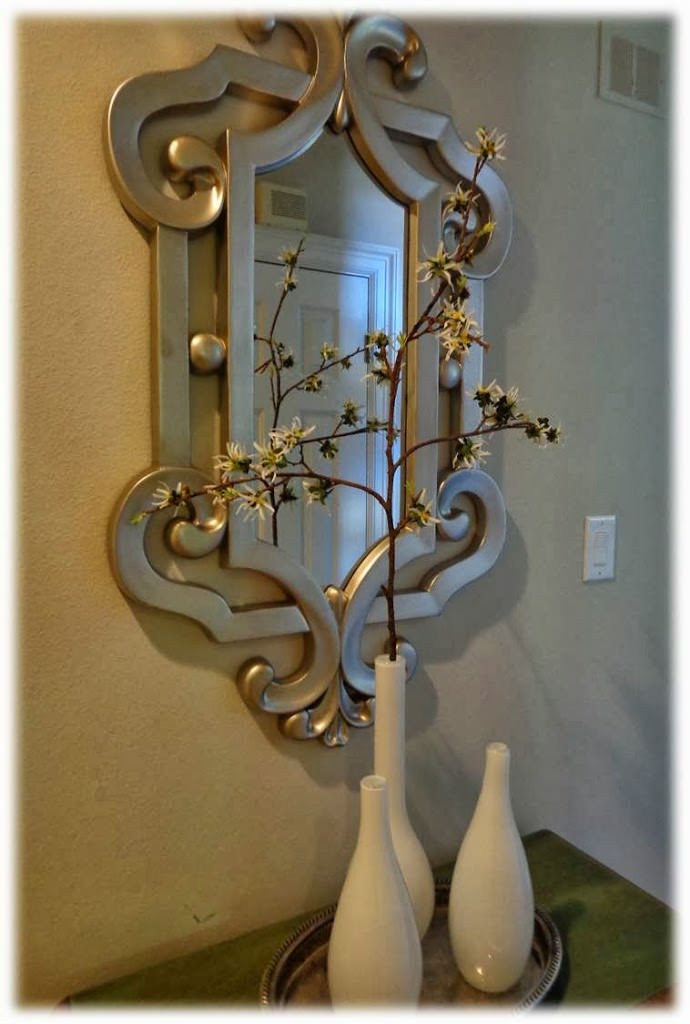
Side tables with drawers are a must in a master bedroom. The lamps look so amazing with the dots on the pillows.  Subtle repetition of detail.

decrenew interiors 23

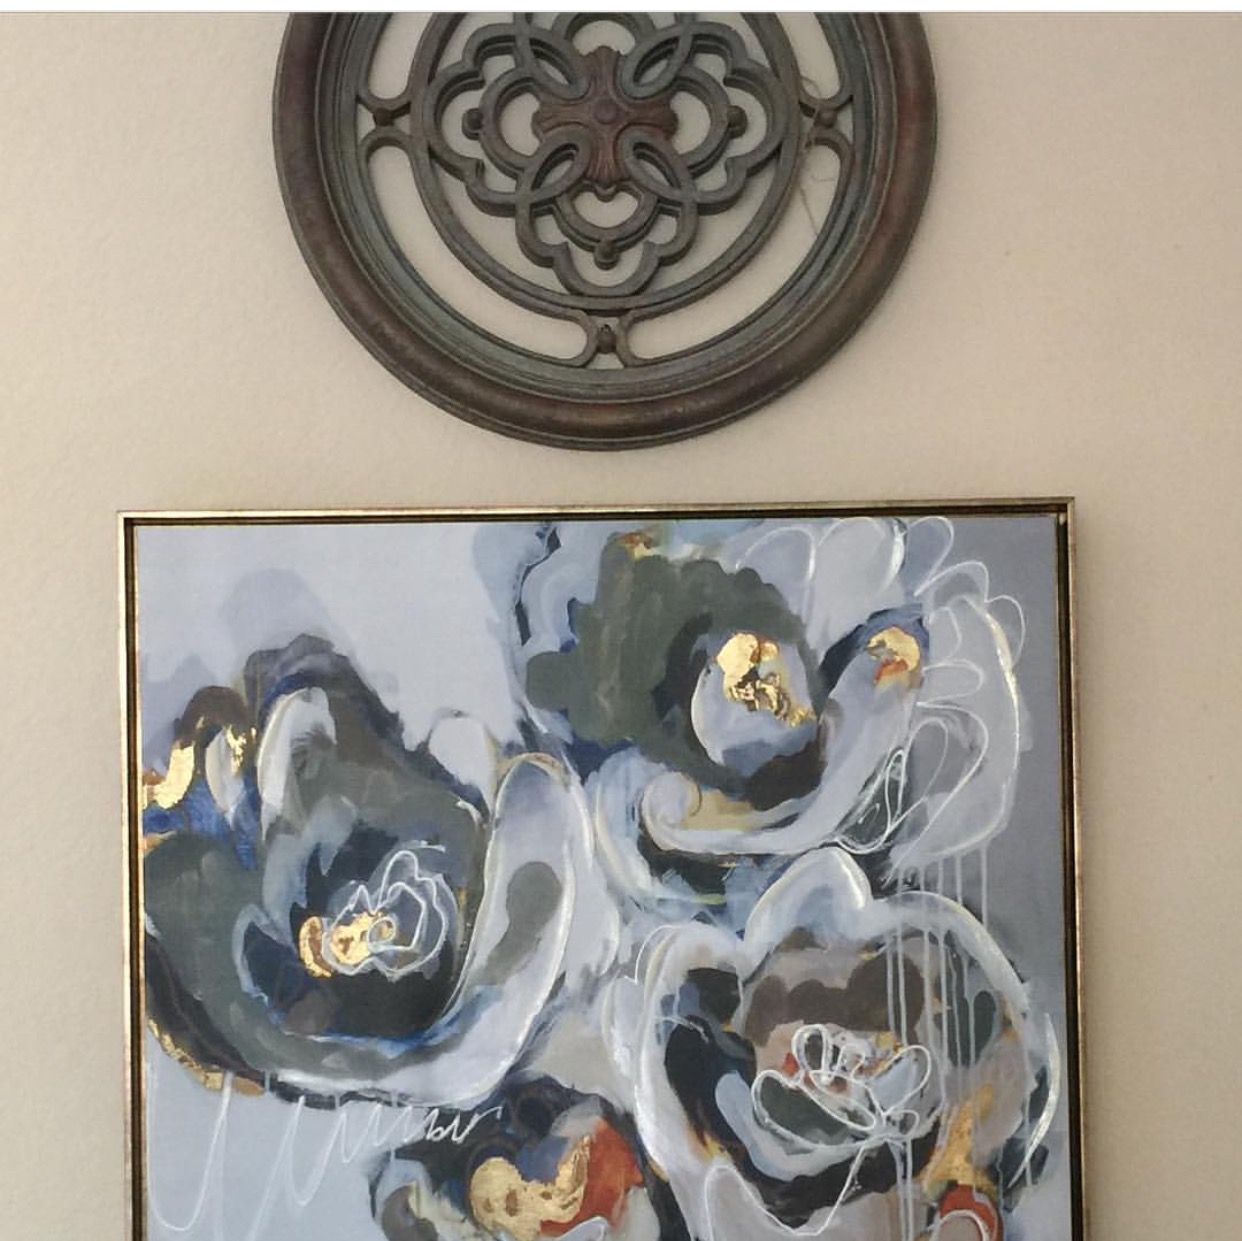
The artwork I found is PERFECT with all the colors and has just enough gold to work well with the pillows.

DSC04604

The draperies were hard to photograph because of the light.  You can see the colors well in the above photo.

Such a great project for a fun couple!

23DSC04578

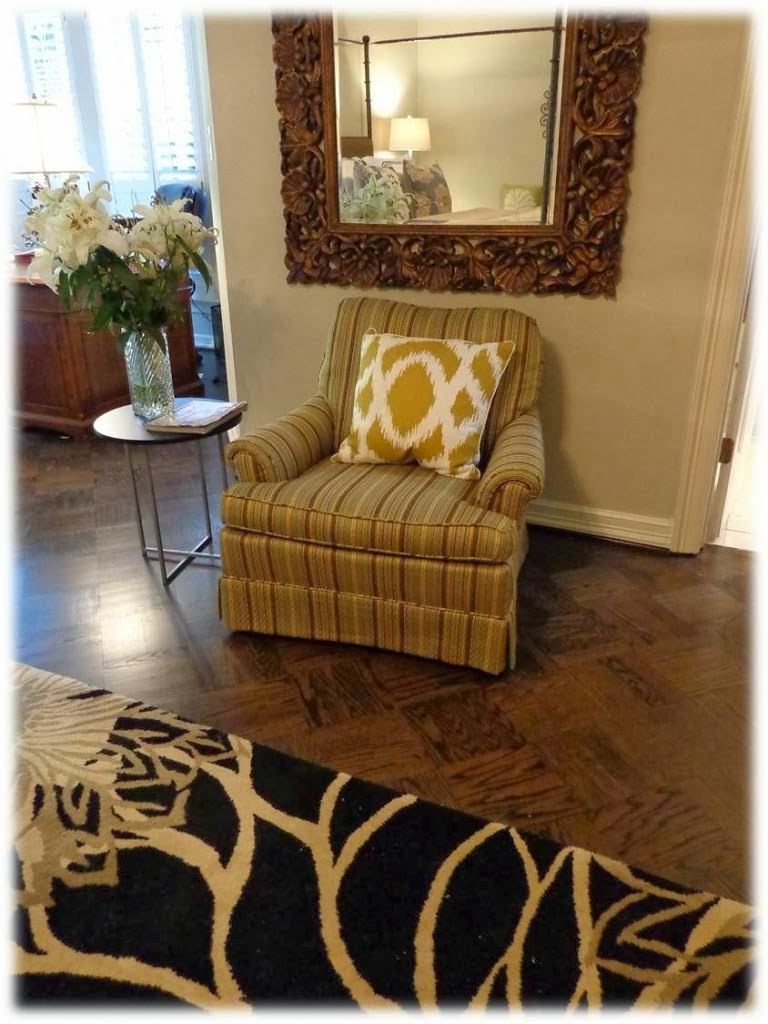
Her grandma's rocking chair even got a makeover.

The joy the client receives. on the day of the installation, has no comparison to the joy and blessing that I receive in being able to make yet another home beautiful!  Connecting Life and Home is such a pleasure.

Hope you are enjoying the Christmas season so far.

IMG_2247

I've started some of my decorating, at least the mantel is done and the stockings are hung!  I am purposely doing simple décor this Christmas.  I'd rather spend more time with my family than stressing about making it all perfect.  Plus, I have to put it all away in a month!  Simple can be beautiful too!

Arabesque Master Bathroom Remodel

decrenew interiors 7

This summer we completed an amazing master bathroom renovation.  We  just  had the remodel photographed so I thought I'd share the pictures with you.

decrenew interiors 8

Carrera Marble countertops provide a modern take on a traditional look so that's what we chose for the countertops & shower surround.

decrenew interiors 6

The gray veins in the marble makes a room look sophisticated and classy.  The accent wall in the shower is my favorite.   The large Arabesque pattern marble is stunning.  The word Arabesque means " ornamental design consisting of intertwined flowing lines."  I just love saying the word A-R-A-B-E-S-Q-U-E because it sounds cool.

decrenew interiors 13

We enlarged the shower and took the marble tile all the way to the ceiling.  Why have all that waisted space!  We added  niches and a bench so she can shave now without falling, LOL.  I suggested a round ottoman for the space and my client found one she loved.  It has a little chair that matches for her vanity area.

IMG_7165-201

 We took the doors off the built in storage so we could use it to display  towels as well as accessories.  The client never used that storage area so it wasn't a waste of space.  Now it looks fantastic for accessories and rolled up decorative towels.

IMG_7143-169

2 shower heads is also a big improvement for a big family.

decrenew interiors 12

We took out the existing vanities and added new ones with overhead cabinets for more storage. I really loved the legs so you can see underneath the vanity, making the room seem bigger.    The client loves antiques and has a lot of wood in the rest of her home so the mix of wood with stone was a great solution.  The round scallopped mirrors soften the space too.

IMG_7077-25

The bathtub was taken out completely and a free standing tub  and bath faucet was installed.  We kept the stained glass window but just enhanced the molding around it.  We put marble on the column ledges and that looks to die for.

Picture16

 I'm in love with this vintage chair!

decrenew interiors 15

The columns were refinished in an "old world"  finish the client really wanted, adding a texture to the space that makes it feel mysteriously aged.

decrenew interiors 14

We added new lighting and that made the entire room come together beautifully, adding such charm.  All on dimmers so the light could be adjusted accordingly.

So here are the BEFORE and AFTER shots!

decrenew interiors 3

Amazing transformation for a lucky couple and their beautiful family.

decrenew interiors 2

There will be loads of soaking in this tub, that's for sure!

decrenew interiors 5

Marble Love

decrenew interiorsdecrenewinteriors2decrenewinteriors3

We are almost finished with a master bathroom remodel.  My client wanted a marble shower, gorgeous lighting, custom vanities and a free standing tub!

1907621_620781544678672_7888475841400896631_n

and....that is what we gave her.  It has turned out beautifully and I'm crazy about all the selections.

unnamed

Here is a before so you can see what we had to work with.

The shower glass gets put in next week and we will do a photo shoot soon.  I'll post pictures as soon as it is all done!

LUXurious, Chic Master Suite

 
Master Bedrooms are always my favorite rooms to redo.  So often we leave our master bedroom until last in our house, however, it's where we spend most of our time. 
 
 
When my I first met with my client, she had the bed and the sheets and a few pieces of furniture in this room.  She left all the old bedding behind when she moved from her Ranch. Decided it was time for a change.  The bed originally had draperies hanging all around it and I recommended she take them off and showcase the beautiful wrought iron work on the bed. She immediately did that and the room came to life!
 
 
We added Luxurious down pillows, a quilt and a down duvet cover.
 
 
The European shams are a great way to bring grandeur to your bed.
This picture was taken looking through the mirror. 
You can see how beautifully the color and patterns work together!
 

The client found the rug and wanted me to decorate around it.  Because the rug is vibrant in color and is a show piece in the room, I didn't want to overdo the bedding.  Instead, I chose a softer more CHIC style to compliment the rug.  For those of you who know me, I'm all about "mixing it up" so it looks really classy.  All the bedding pieces were purchased through different vendors, making it look interesting.  It's all about the layers!

 
I found the lamp bases and added new shades to them because the ones that came with the lamps didn't appeal to me.  The new gray shade really looks handsome.


So inviting, I almost spent the night.

 
The artwork above the bed with the white mats really looks fabulous with the white pillows.  My client already had the chocolate brown bed skirt so the euro shams with the embroidery all around the edge really  pulled it all together.
 
 
We moved the chair in from another room.  It wasn't anything too amazing but in great shape and the perfect reading chair.
 
 
By adding a vibrant, updated pillow to the chair it immediately made it stylish.
 
Great way to spruce up a chair is to add a pillow, can you see how this pillow makes the chair 
now?
 
Fun artwork display with items that were special to the client that she specifically wanted showcased.
 
We added splashes of the colors we used in the bedroom into the master bathroom too.
 
 
Who needs solid towels when there are such great patterns out there.  Mix solids with patterns to create a more interesting look.
 
 
New artwork to make it feel fresh and finished.

 
This little cabinet is in the hallway right outside the bedroom.  We made it look more modern by putting this sophisticated silver mirror above it.
 
 
Instantly gorgeous grouped with 3 glass vases on one of her silver trays.
 
 
Hope you enjoyed the tour!
 
I found out this week that I'll be having foot surgery sometime next week so I'm slowing down a bit because I'll have to be off it for 2 weeks, urgggg.   Working on 5 new design plans while I have to stay off my feet so I won't be doing any installs over the next few weeks. 
 
Ruthie


Tiny Bathroom Ideas and Inspiration

 
So it's been a 6 week process but we are finished with this "tiny" bathroom remodel.
 
 
When my client first contacted me she was desperate for an update to her hall bathroom.  She had NO storage and the bathroom was not functional for her family (teens involved here).  Her priorities were to add as much storage as we could and a place where more than one person could get ready at the same time and to do it all within her allotted budget.
 
AFTER
 
Of course, like I always do for clients that are wanting me to handle the entire job for them, I put together a design plan for her with color suggestions, flooring and wall tile choices, cabinet color, hardware, shower curtain options, fixtures, lighting, etc. 
 
She loved the design plan so we moved ahead right away! 
 
 
 Ruthie's tips for making a "tiny" bathroom feel bigger.
 
1. Bring the tile to the ceiling
2. Use larger tile so you have less grout lines
3. Use light, fresh colors
4. Add recessed lighting to add lots of light
5. Use curves to create softness (round mirrors, etc.)
6. Add a pocket door if you can
7.  Maximize your storage so you don't have "stuff" all over the counters.
 
We ripped out the old cabinets and installed custom made ones.  We installed new counter tops with a new under mount square sink.  Didn't have room for 2 sinks but that's okay because storage was more of a priority for this client.  2 round mirrors were added instead of the large rectangular one.
 
 
  I recommended that we curve the counter top around the toilet area to give them more room.  Of course we couldn't put cabinet doors underneath this part of the counter because then they wouldn't have been able to open them because of the toilet being in the way.  Our solution was to do add adjustable shelving so they can add baskets of their choice for misc. storage.  We hid the toilet paper roll in there too so that's nice :)  New brushed nickel hardware really dressed up the cabinets as well.  Notice how we mixed them too so they aren't all pulls.  Knobs and pulls together look more interesting.
 
We added plugs to the inside of the cabinet so they can store their hairdryers there permanently!
 
 
New tile and bathtub and a new niche for hair products. I love the little miniature shelf for razors, etc. We added small recessed lighting to the shower area too so they can see and have no excuse but to  be squeaky clean!
 
 
Big difference isn't it?  The wall color was inspired by the medallion shower curtain I found.  It really is a fresh, clean, inviting color.
  The laminate wood floors really added a warm look to the space.  She now has tons of cabinet space too so everything can be hidden and all things have a place.
 
 We put a pocket door in as well so we could add cabinets to one of the walls without interfering with the door.  Nice big, deep drawers for makeup and a lighted mirror that is attached to the cabinet that pulls out and magnifies for convenience,  Eeeek!!!
 
It's a gorgeous space now and functional too.
 
Hope this bathroom inspired  you to make a "tiny" bathroom into a "grander" space!
 
Visit my website, DecRenew Interiors to see my Design Portfolio.